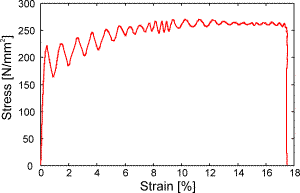
The following figures show the results from a measurement at an aluminum alloy sample. The sample shape was 8 mm x 4 mm (width x depth) and the testing speed was approximately 6 m/s. The first figure depicts the stress strain diagram. The typical ringing of the force signal can clearly be seen: 
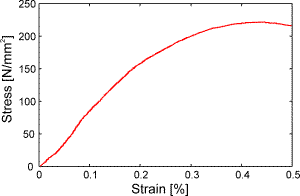
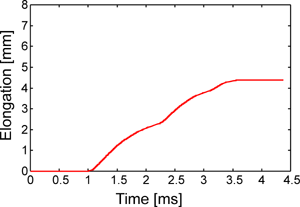
There is another 'vibration' in the strain signal which is shown at the end of this document. The next figure shows the beginning of the stress strain diagram with the elastic range. 
There are about 5000 data points shown - to calculate Young's modulus, more than
1000 values are available. |